
The Azure Pricing calculator is a tool used to estimate what costs you can expect to incur when utilizing Azure services. In this series of articles I will walk through the different options available.
Part III
Creating an estimate of what your Azure monthly recurring subscription costs will look like can be quite challenging. Azure today has hundreds of solutions & services available with various pricing structures, tiers and different methods of purchasing options available.
The goal of this Ultimate Azure Pricing Calculator Guide is to provide clarity when it comes to putting together estimates with the official Azure Pricing Calculator.
Navigating with the Azure Pricing Calculator
Within the Azure Pricing Calculator there are some best practices to utilize when you are putting together an estimate here are my top ones.
First - Log in!
Logging into the Azure Pricing Calculator is a must! You will then be able to save your estimates, and continue where you have left off previously. The Azure Pricing Calculator doesn’t save estimates automatically, so you need to make sure you save them.
- Click Enter your information
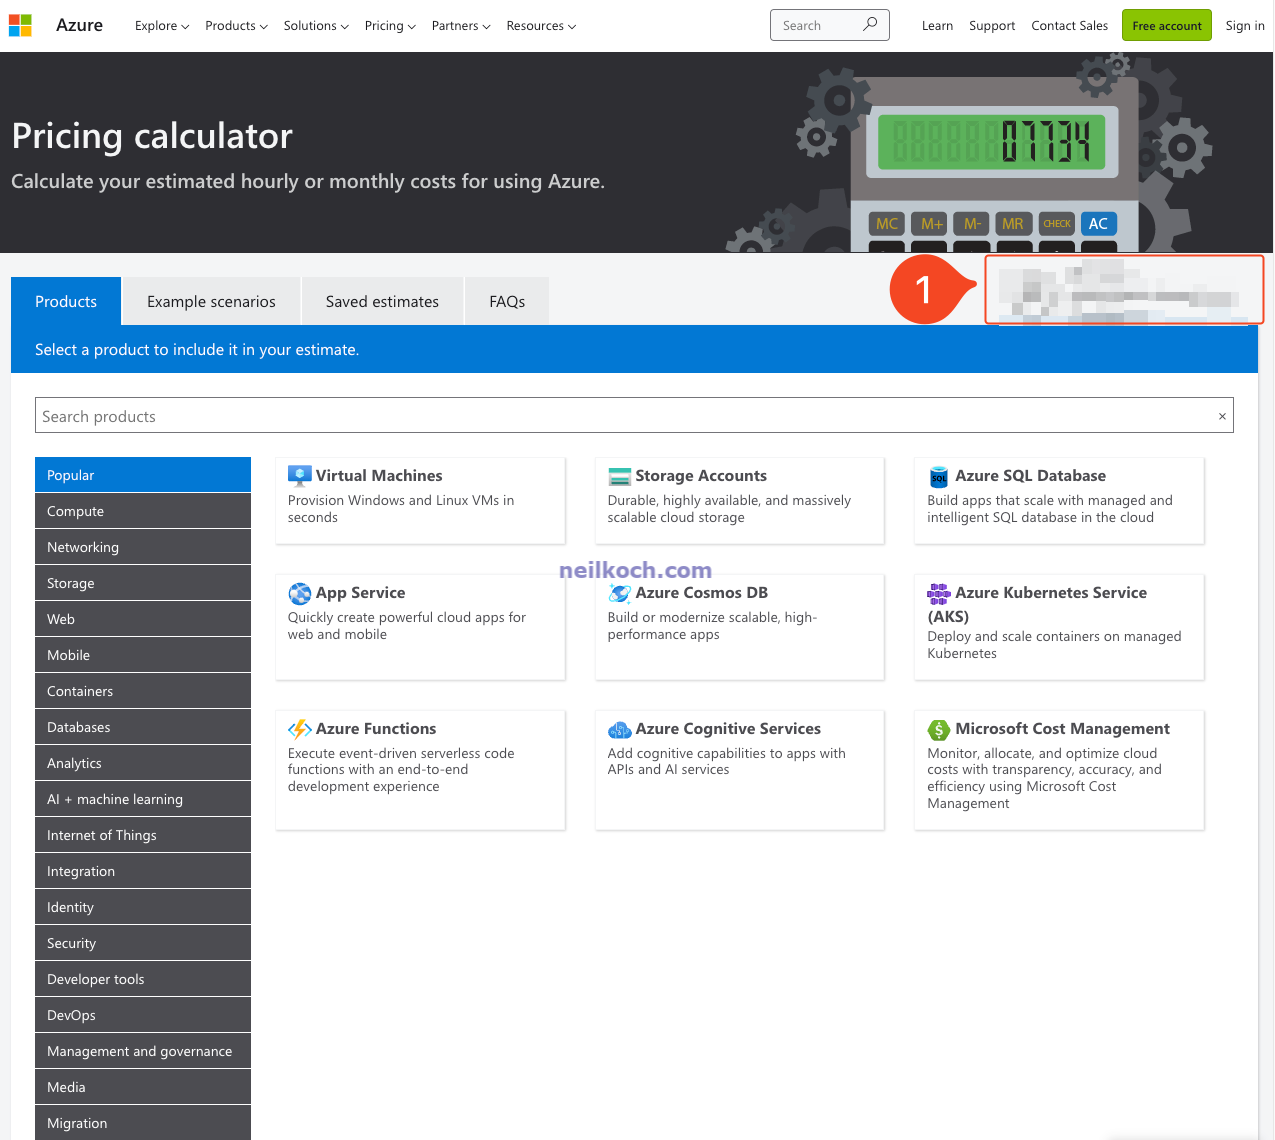
After logging in you will find your details in the top right-hand side
- You’re now logged in!
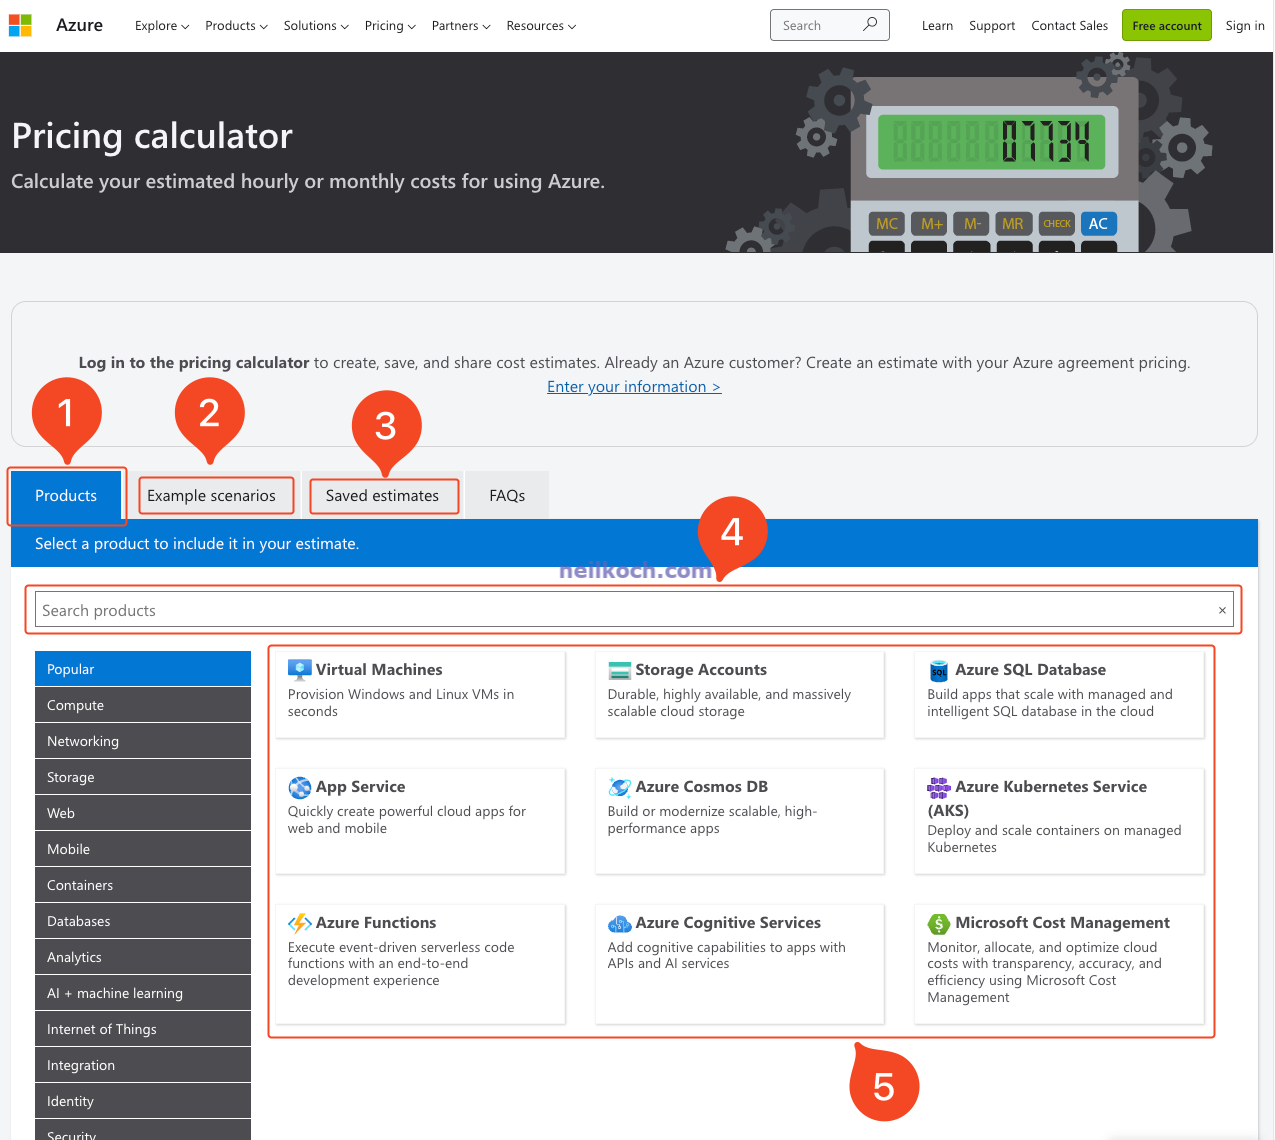
Azure Pricing Calculator - Landing page
- Products - This is where you find all the Azure products, services, solutions available to be estimated
- Example scenarios - Here you can find some common solutions
- Saved estimates - Where you will find your saved estimates
- Search products - You can search for almost any Azure product, service, solution here
- Popular options - These list the most common Azure solutions
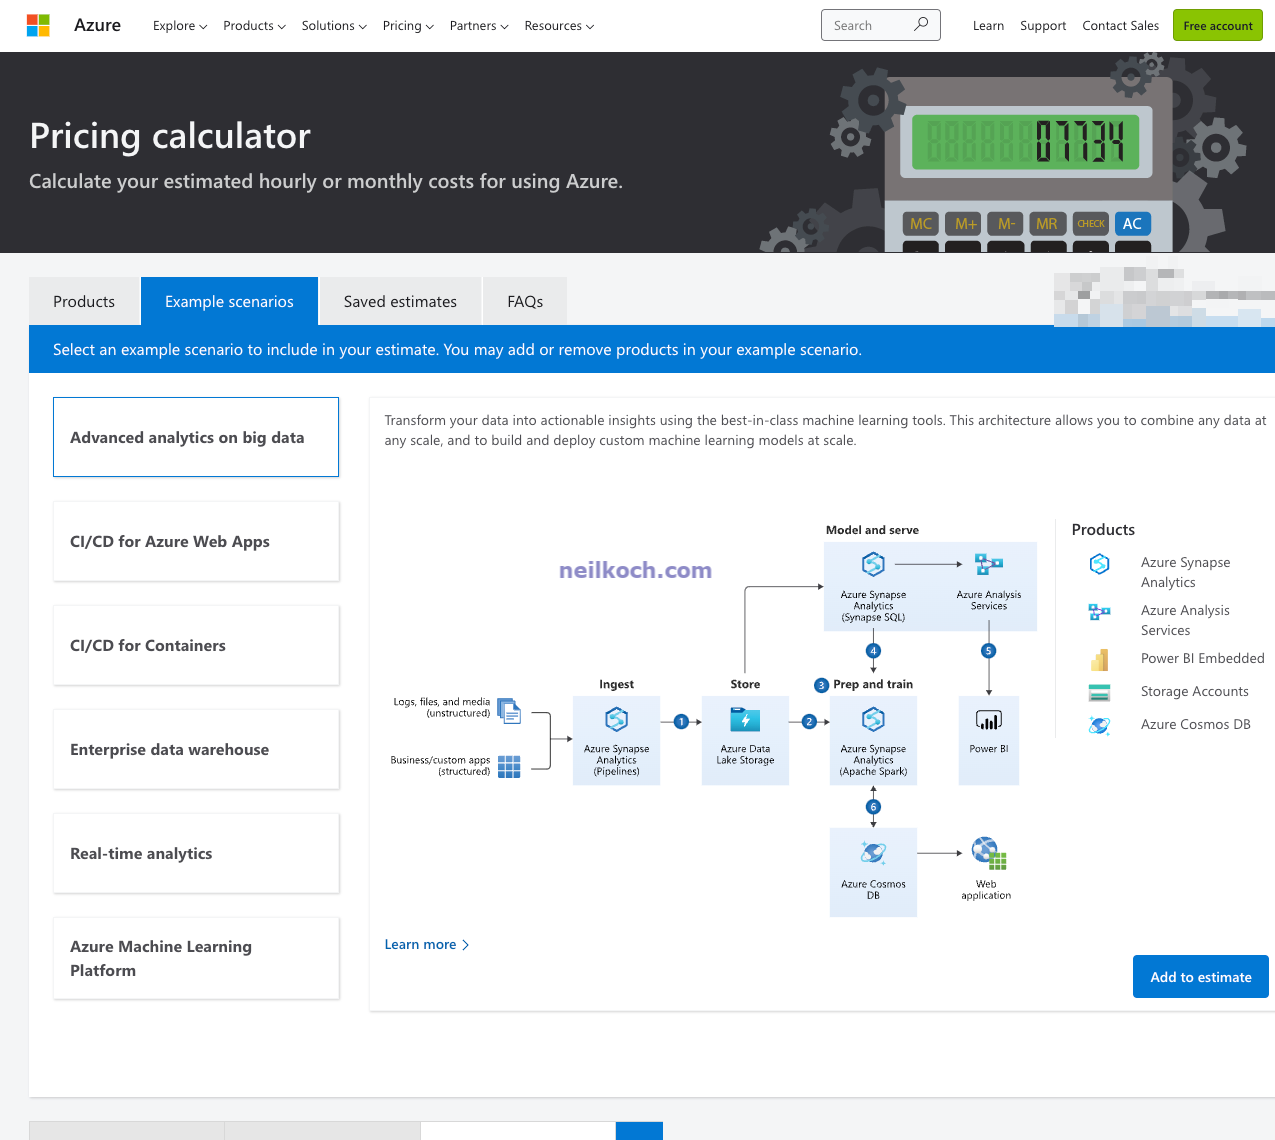
2. Example scenarios
Here is what the Example Scenarios tab looks like. If you click ‘Add to estimate’ it will automatically add all the resources required to price out/ estimate the selected solution to the Azure Pricing Calculator.
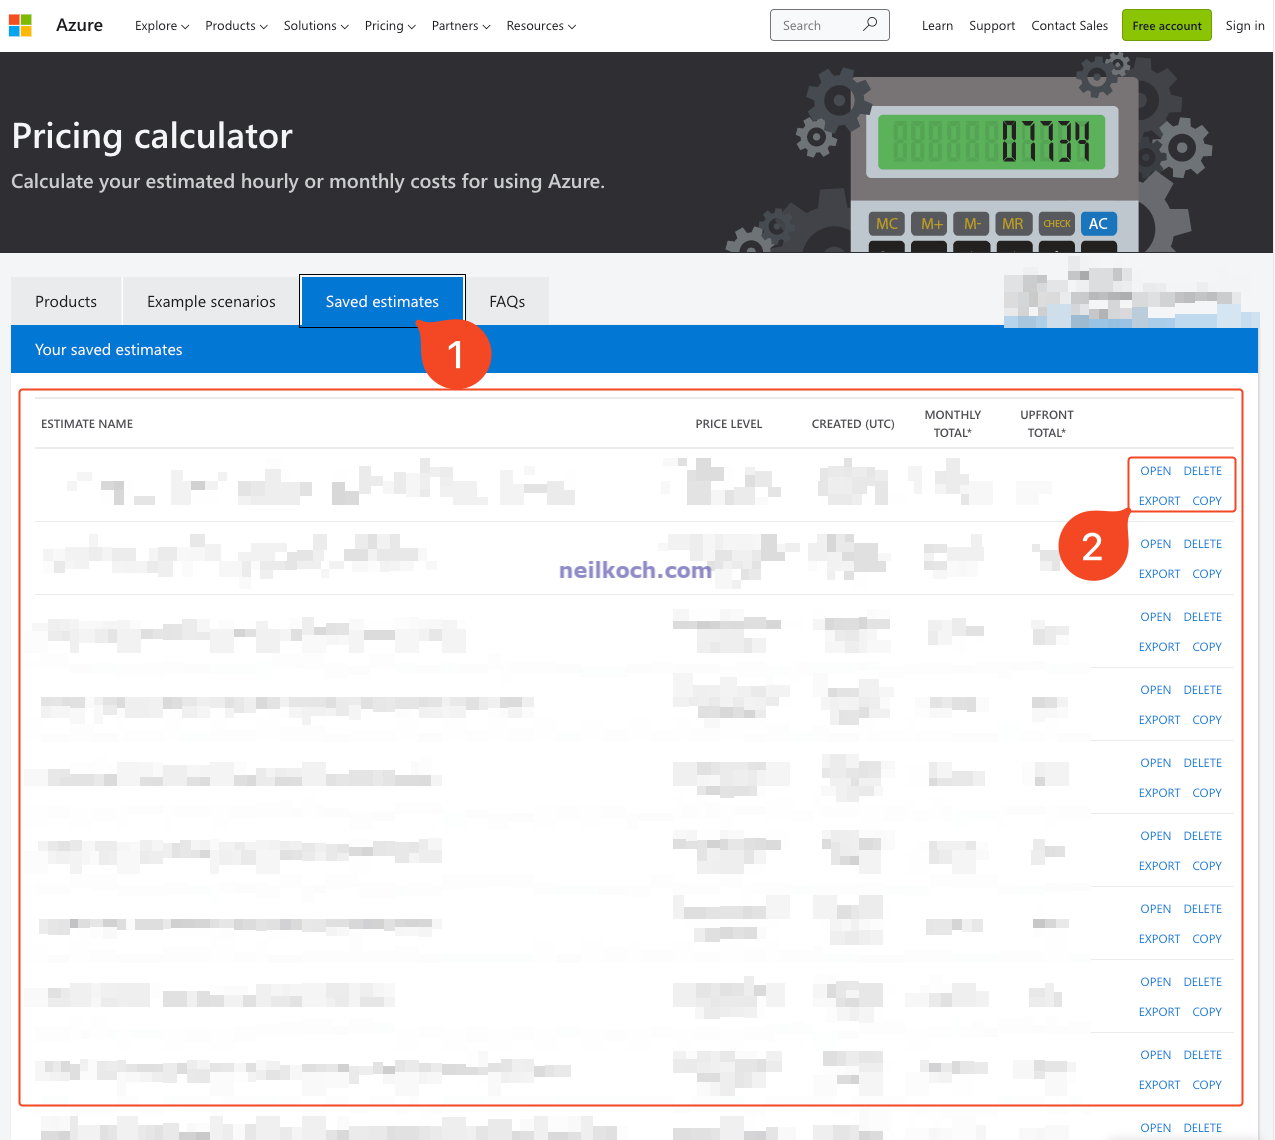
3. Saved estimates
Within the Saved estimates tab you will find your saved estimates.
- Saved estimates tab
- From here you can Open, Delete, Export or Copy
4. Navigating estimates
- When creating an estimate, you can use the Tab’s here by selecting existing ones you may already have open. Or by creating a new estimate by clicking the [+] button on the page.
- You can create unique names for your estimates here, when you Save them, they will keep the name. If you click ‘Save-as’ at the bottom of the page, they will save as a new estimate. If you are looking at accessing these, you will need to go into the ‘Saved estimates’ area to retrieve them.
- The downwards facing caret - You can expand the line items by clicking these to see the specific details within your estimate
- All estimate line items (Products you’ve added) can be duplicated by clicking the ‘[+]’ button. This will add a duplicate at the bottom of the estimate. The ‘Trash can’ (or Rubbish Bin/ Garbage Bin depending on where you live) removes the line item (Product) entirely from the estimate.
- Here there are further items for modifying the estimate. Below I will go into further detail.
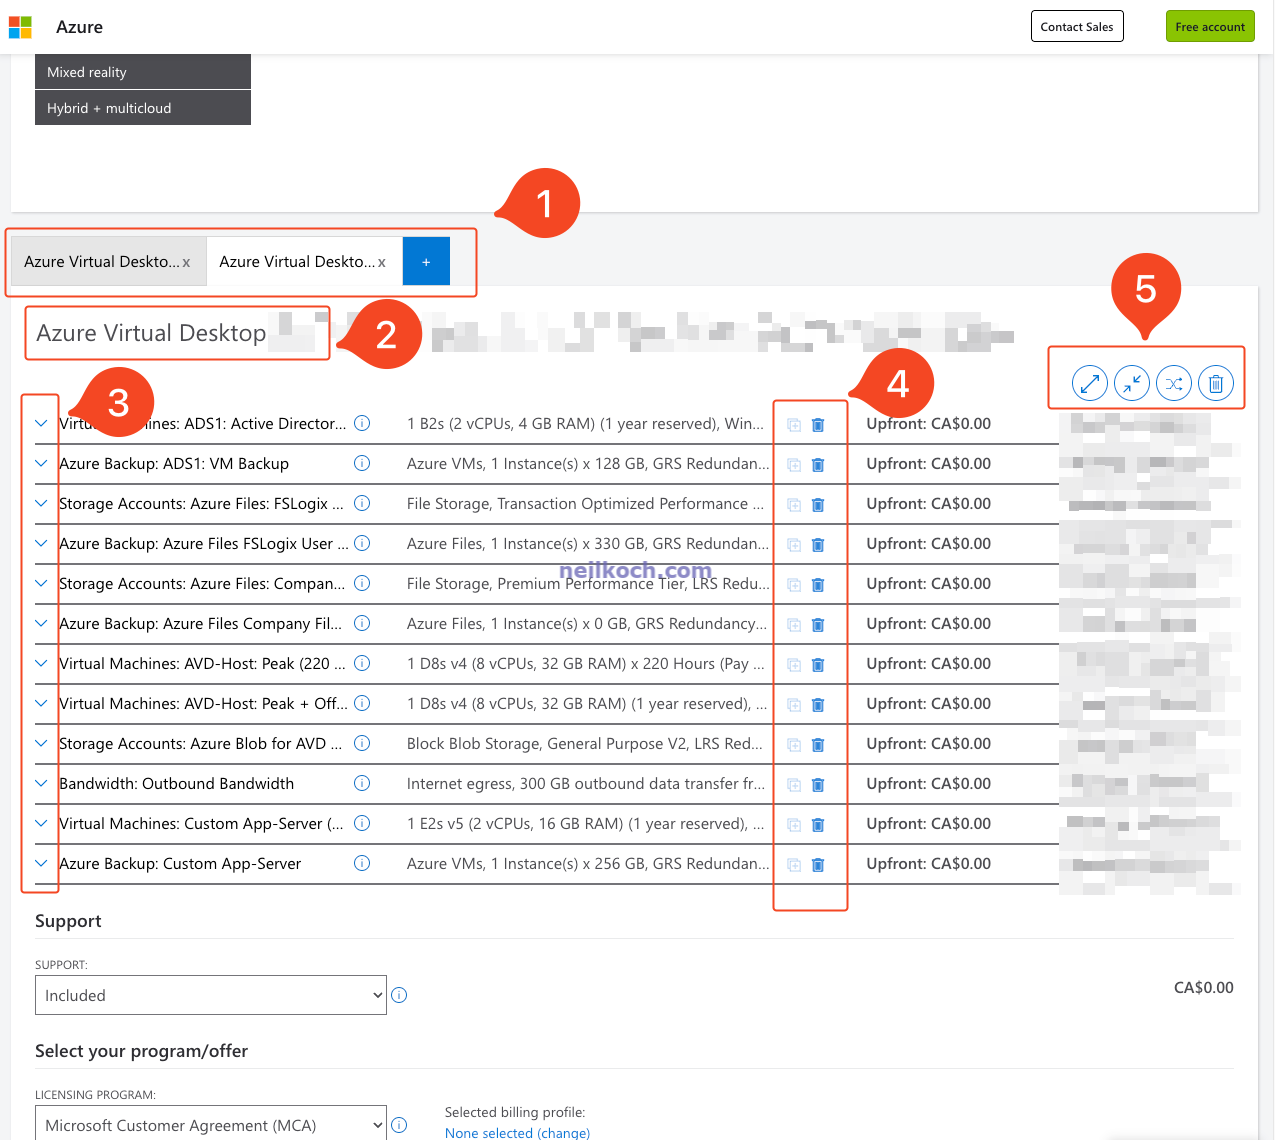
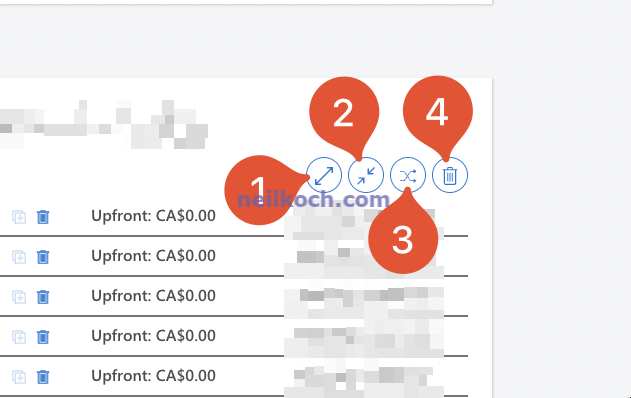
5. Modifying estimates
- Expand all line items. Similar to the downwards facing caret, however it does all items at the same time
- Collapse all. Minimizes all of the line items (Products).
- Move. This option allows you to move your line items and change the order of them.
- Deletes all line items/ products. Note: There is no Undo button with the calculator.
Support us
6. Moving line items
Here is an example how to move line items/ products around with the calculator.
7. Saving and sharing your estimate
Remember to save and share your estimate.
Photo by Mykola Makhlai on Unsplash