
The Azure Pricing calculator is a tool used to estimate what costs you can expect to incur when utilizing Azure services. In this series of articles I will walk through the different options available. This one focuses on the VM selector tool, selecting virtual machines, selecting storage and then adding them to a basic Azure Pricing Calculator estimate.
The Foundations
Creating an estimate of what your Azure monthly recurring subscription costs will look like can be quite challenging. Azure today has hundreds of solutions & services available with various pricing structures, tiers and different methods of purchasing options available.
The goal of this Ultimate Azure Pricing Calculator Guide is to provide clarity when it comes to putting together estimates with the official Azure Pricing Calculator. For the first beginner example I will provide a walkthrough of the Virtual machine Selector tool and how this links directly with the Azure Pricing Calculator.
Finding Virtual Machines in Azure
If you’re looking for a specific Virtual Machine type you can utilize the Virtual Machine Selector tool. Once you’ve found the Virtual Machine you are looking for you, you can load it automatically into the Azure Pricing Calculator. The Virtual Machine Selector tool helps you select a Virtual Machine based on three different options listed below.
- Find VMs by workload type
- Find VMs by OS and software
- Find VMs by deployment region
Find VMs by workload type
The most useful option I have found is the Find VMs by workload type option.
Here is an example below on how this process works. The goal is to narrow down a VM option and then at the end add it to the Azure Pricing calculator.
Criteria
For this example we will find a General Purpose workload VM that has a minimum of two (2) vCPUs and a maximum of four (4) vCPUs with exactly 16GB of memory. The OS Managed Disk will be configured with 128GB SSD. The VM will be running Windows OS only and located in the Canada Central Azure Region.
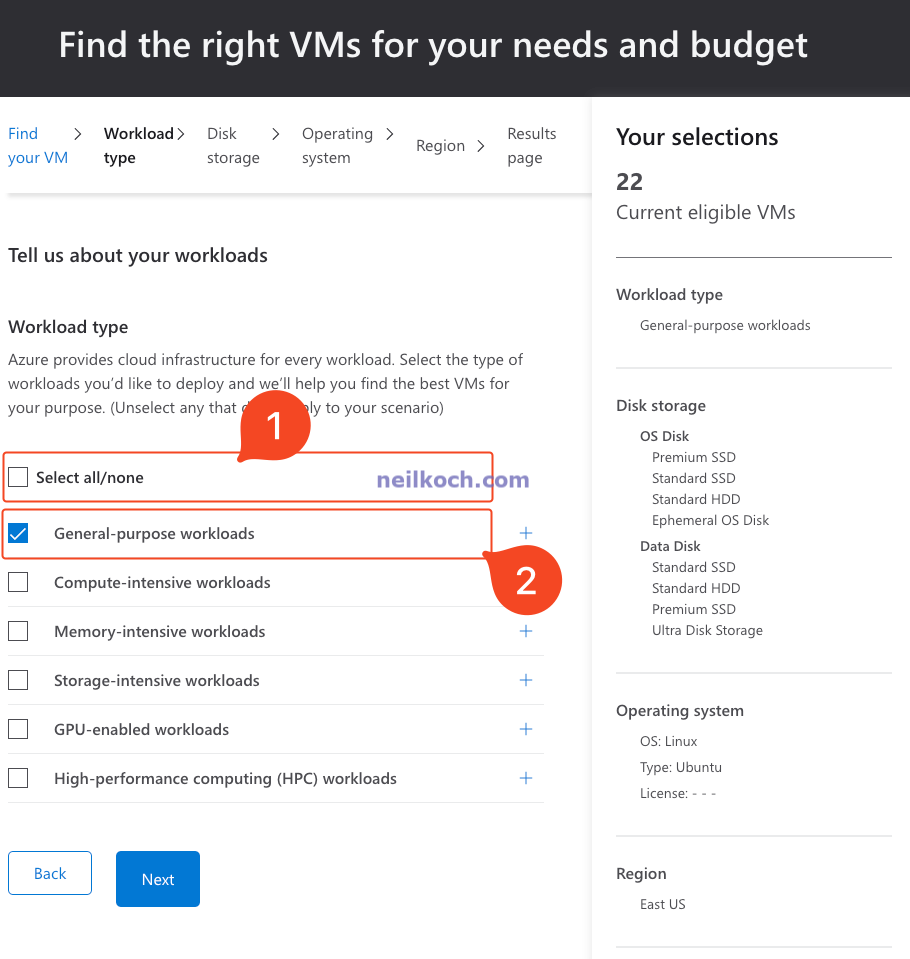
Step 1
- Deselect the checkbox Select all/none
- Select General-purpose workloads
- Click Next
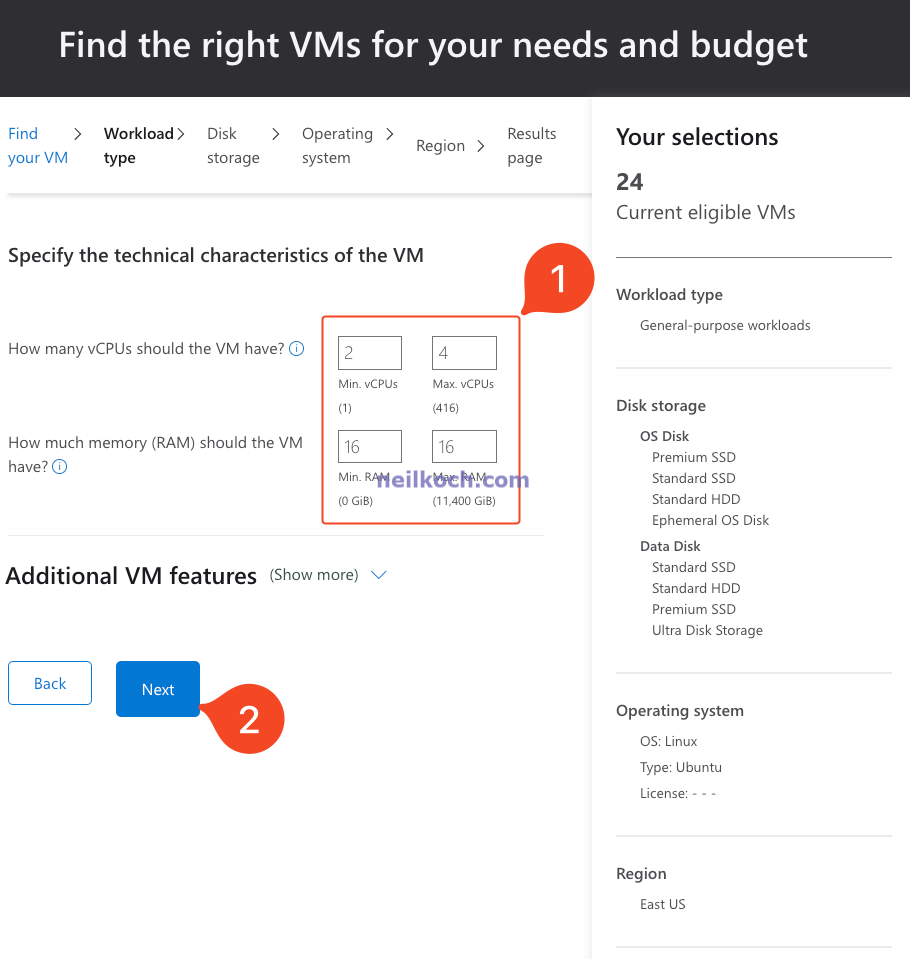
Step 2
- Enter 2 for Min. vCPUs, 4 for Max. vCPUs, 16 for Min. RAM, 16 for Max. RAM
- Click Next
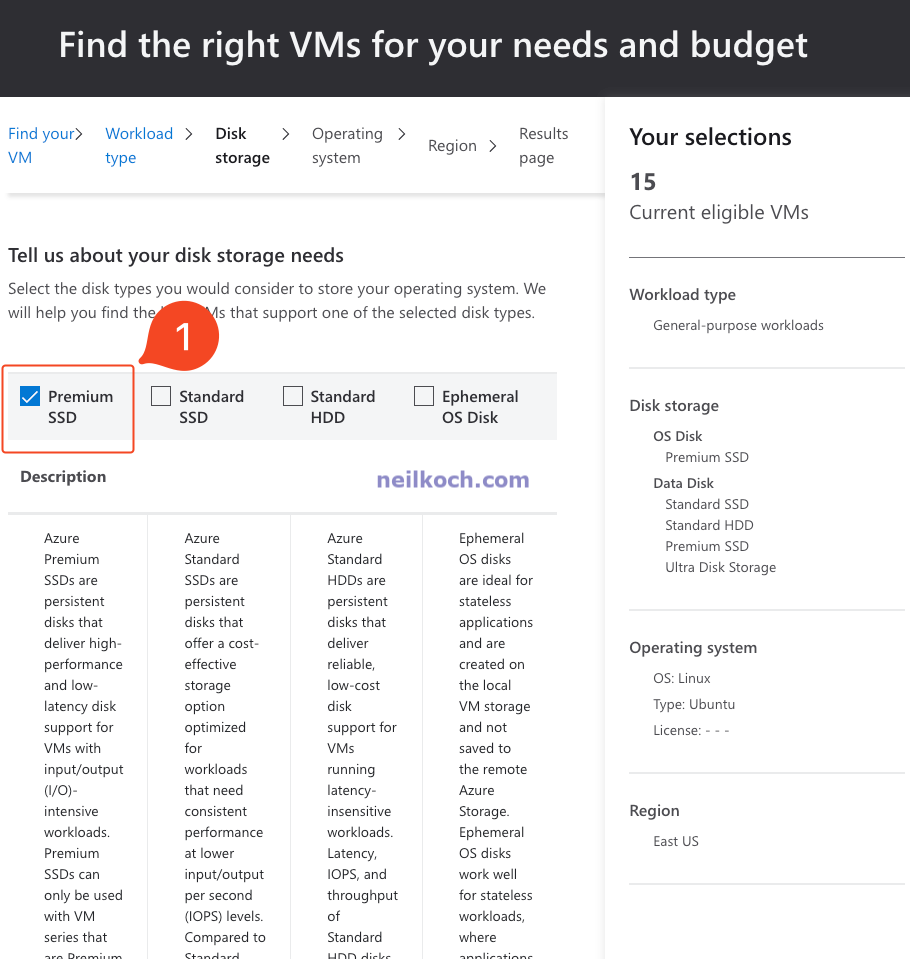
Step 3 (Part A)
- For this example we will use Premium SSD. Deselect all the others and select Premium SSD (Don’t click next yet!)
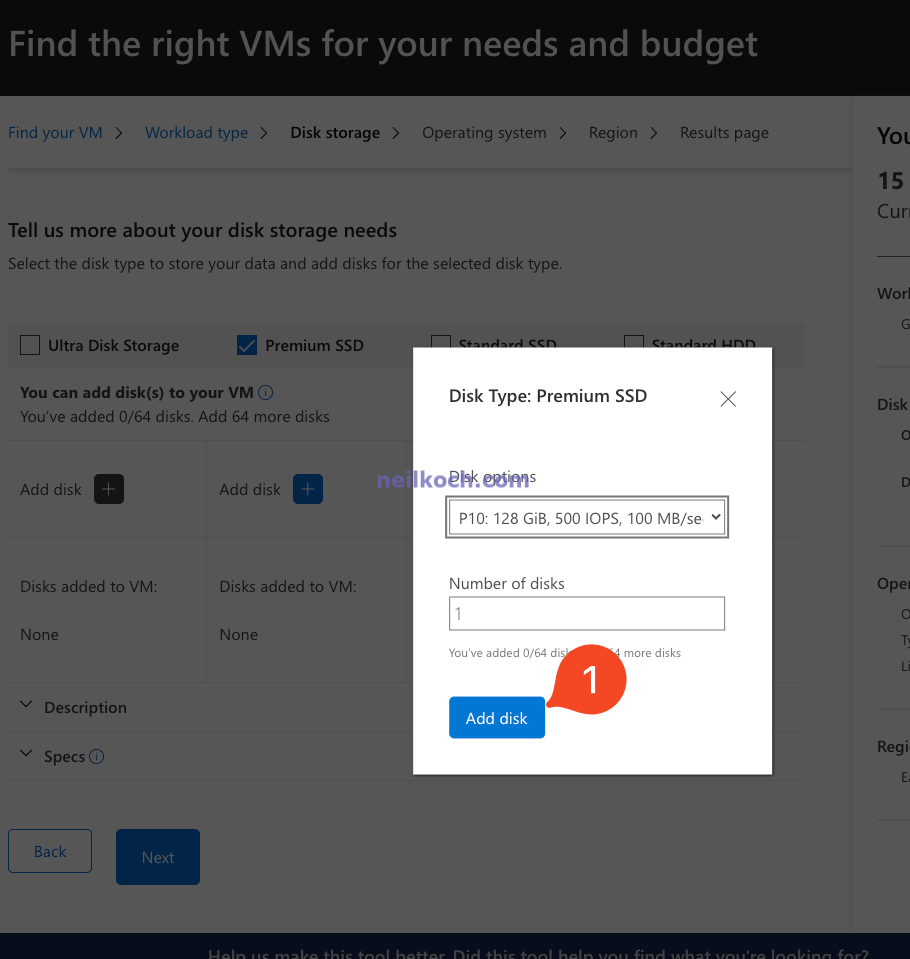
Step 3 (Part B)
- For Disk options click the dropdown menu and select P10: 128 GiB…
- Keep the Number of disks as 1
- Click Add disk
- Click Next
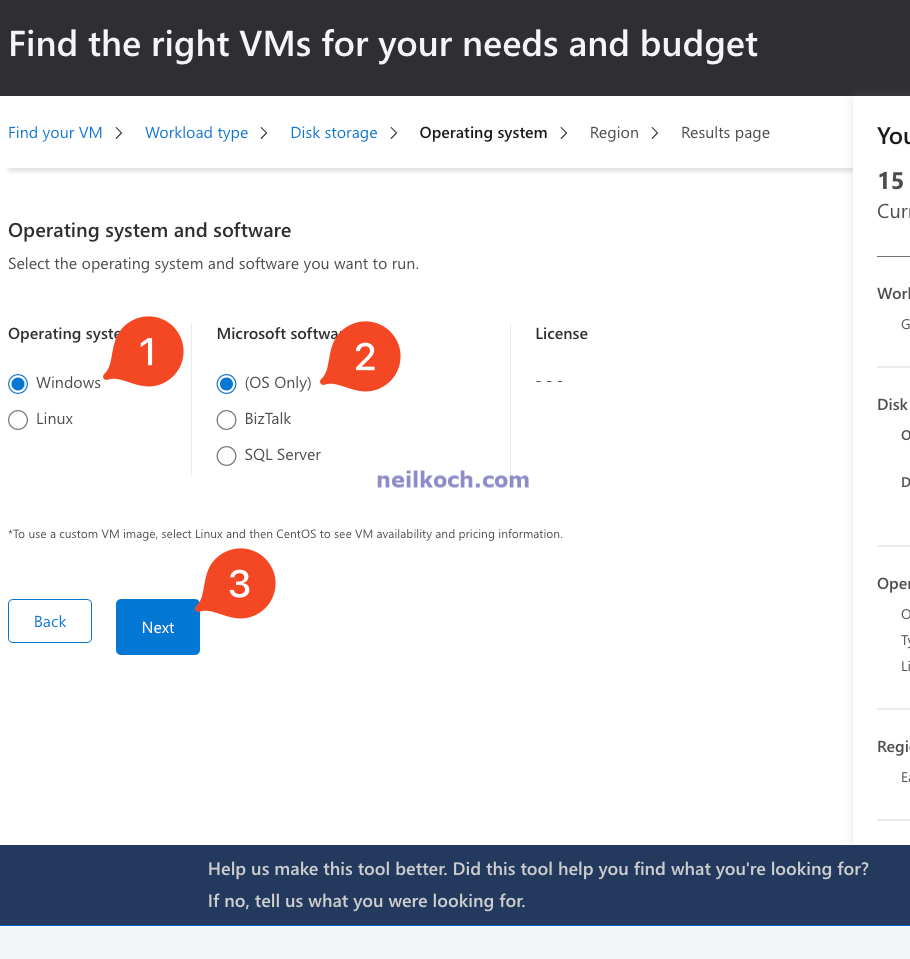
Step 4
- Select your Operating System
- Select your Microsoft software option
- Click Next
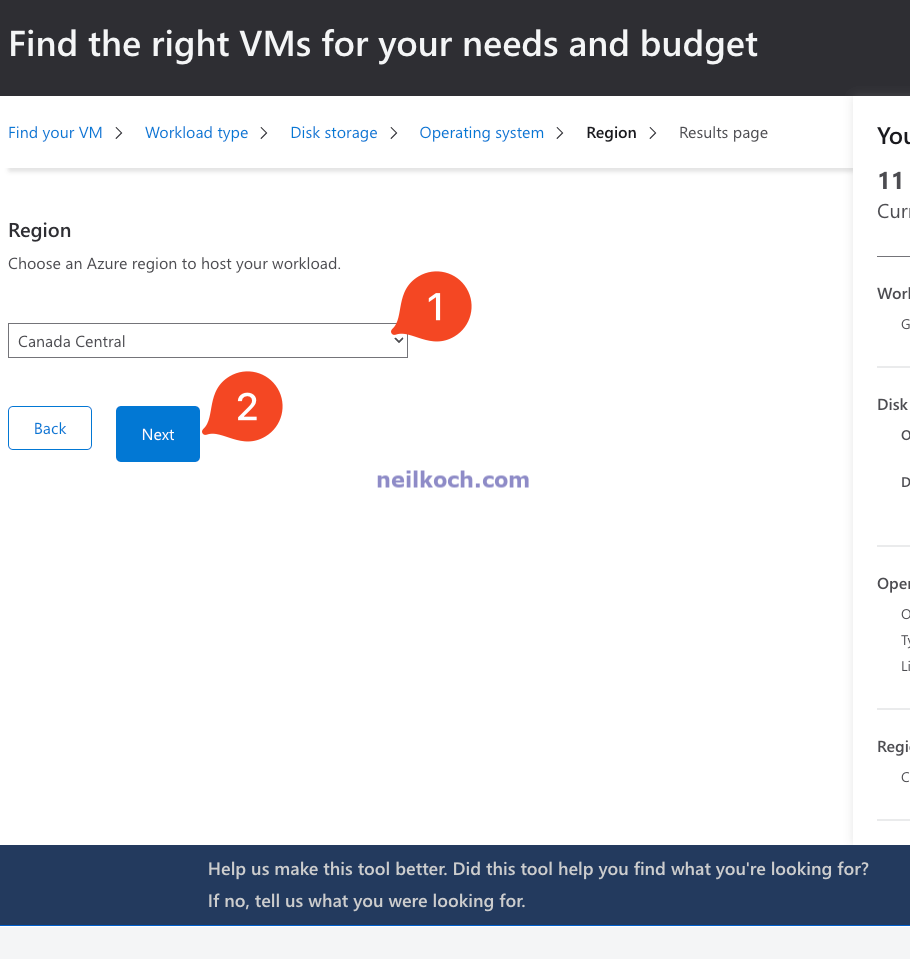
Step 5
- Select the Azure region to host your workload
- Click Next
Step 6
- Select your Currency you would like the estimate to be in
- Display pricing by Month or Year
- Turn ON or OFF the Show Azure Hybrid Benefit pricing option
- Click the [+] symbol to add the VM Recommended Azure Virtual Machine(s). This will automatically add the VM to a new Azure Pricing Calculator estimate in a separate window.
- Note: The VM added, although we had selected it earlier will not include the Managed Disk. For this, click Selected Data Disk(s)

- When clicking the [+] symbol a automatic pop-up will occur that looks like this

Step 7
- To add the Data Disks. Click Selected Data Disk(s)
- Click the [+] symbol to add this to the Azure Pricing Calculator
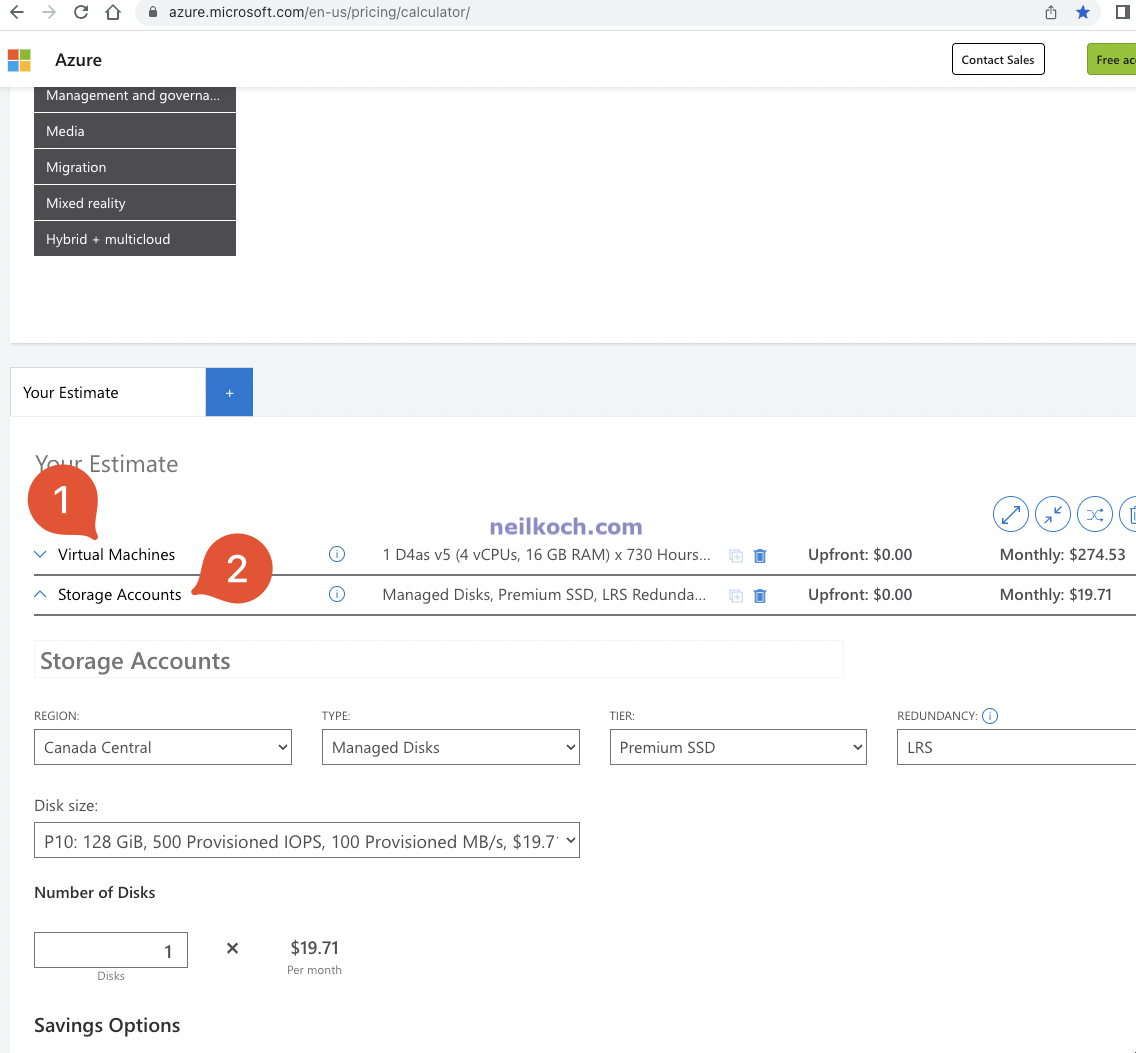
Step 8 - New items added to the Azure Pricing Calculator
- Virtual Machines are now added with the configurations selected. This is handy as if you were to manually add these into the Azure Pricing Calculator, you would have to search or at least know where they are across all the different VM types.
- Storage Accounts are now added with the configurations selected.
Finishing up + Saving and Sharing your estimate
You have now completed creating a basic Azure estimate utilizing the Azure VM Selector tool + Azure Pricing Calculator tool for one VM and one Managed Disk. After you have created your Azure estimate with the Azure Pricing Calculator you can either Download, Save, Save-as, or Share. This is also detailed in this short walkthrough below.
- Click Save to save your estimate
- Click Share to share your estimate. This will provide you a unique URL which you save, or share for future use.
Support us
How to find Reserved Instance pricing information for Virtual Machines with the Azure Pricing Calc?
Check out The Ultimate Azure Pricing Calculator Guide - Part II
Photo by Sasun Bughdaryan on Unsplash